Digital Knit
The page where I document all my digital knit swatches and experiments as well as render exercises.
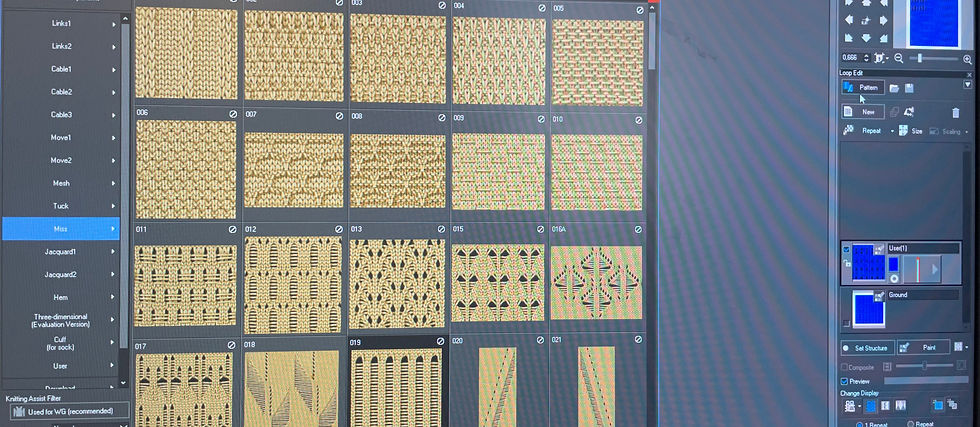
Swatch Experiments


With the loop editor I inserted a cable pattern and then on the technical window saw which stitch properties it contained. Like that I drew the stitch properties the way I wanted the swatch to turn out and added ladders by skipped stitches in between.
The loop simulation had an interesting effect because on Qualoity setting high the watch looked super messed up but on medium it looked fine (left) then I tried putting quality super and the watch simulated like shown above.


For creating a move & miss and ajour swatch I used the pattern tool again and then duplicated the different patterns by using the repeat tool.


For this swatch I used the pattern tool again and then used the brush tool to draw on the watch. To paint the stars I used the copy pen to create a repeat of the stars.

Image to Knit


Putting a pattern into a knit in DesignPro felt fairly easy. You upload your photo, put on the jaquard setting and adjust your gage. Then you can choose the which colors you want to have represented within the pixels/stitches with an eyedropper tool. Since the Shima Seiki only allows four colors some of my swatches came out less recognizable. For a the robot holding a woman swatch I ignored the 6 colors restriction just to see what happened. I really like this swatch because of its outline shape since I removed the background of the image first.
It was really intresting to play around with the tickness of the yarn, the amount of gage, amount of colors etc.


6 colors chosen


3 colors chosen


10 colors chosen


5 colors chosen
Digital Twins
digital into physical


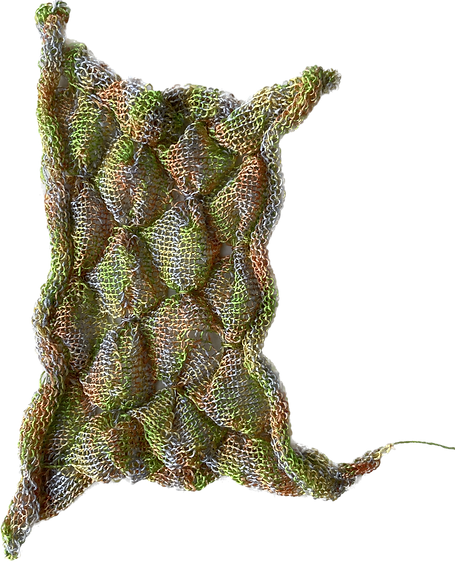
Recreating this swatchb in real life felt fairly easy at first since I was very used to the cableing technique. Now in hindsight I would have chosen other yarns to mimic the digital swatch better and get a denser knit.
While making this swatch in DesignPro was super easy since I just had to choose a pattern which I then repeated, to make this in real life was quite difficult sicne calculating where the ajour holes need to go was tough. In hindsight I would've just done one shape instead of 3 that also wouldve matched the yarn better and made it easier.
physical into digital

Translating a swatch I already made from physical to digital was way easier than the other way around. For this swatch I ahd the exact steps and needles of the tucking written down so I knew exactly what to put in in DesignPro.
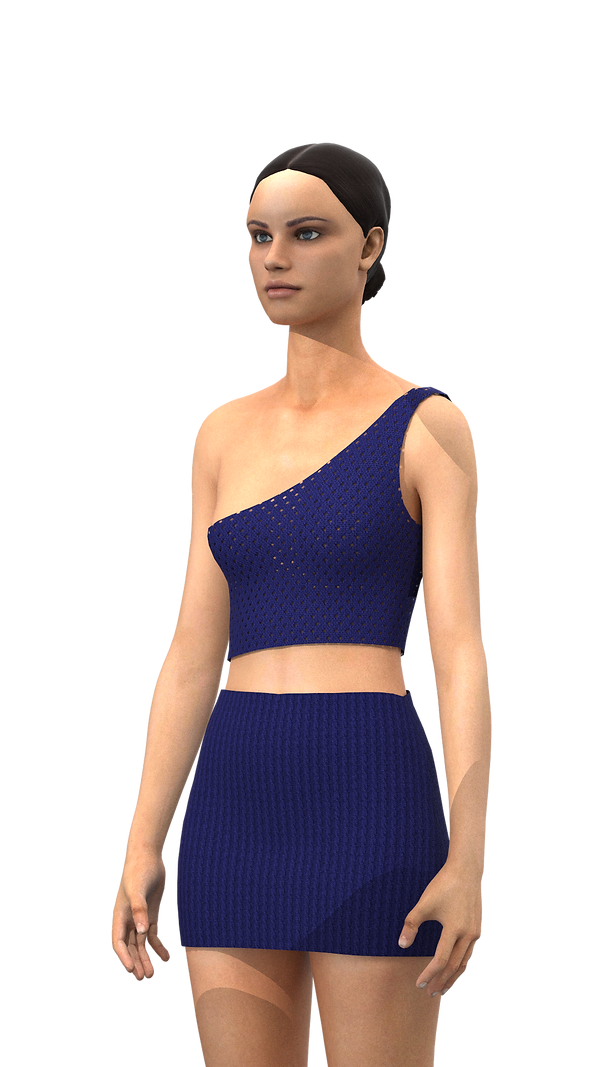
Masking


The maskign took quite a bit of preparation work; choosing a model to put the knit one, wasking the outlines, turning those outlines into patterns, making sure the grainline is correct for the knit. After this preparation was done it was a super easy process tho to load in the knit and like that I also got many different variations since I found it so interesting to see how the knitsamples I made could look on a garment.

%20Original%20Color%20(10).jpg)
.jpg)


Knit Texturing


The texturing was a lenghty process in the beginning steps for the preparations. First I made a pattern in CLO and then uploaded it to PMG. There I corrected the pattern and could turn the different panels into a PPP file. I then uploaded that ppp file to DesignPro and selected Shaping Pattern in the beginning. In the loop editor I could then upload a loop file of a knit I wanted to texture in CLO later. This I then exported as a png in color and in grey to have as a map later. To create the other needed texture maps I went to a normal map website and there could download the maps. When I opened my pattern file in CLO I just added new fabrics and put in the textures I made. And then I could render the finished product.


Photoshop Stitches


twin yarn ribber 0-0
elastic yarn ribber 1-1
transfer to front bed
knit single bed